Getting Started with the Roman Research Nexus

This page provides a brief introduction to accessing the Roman Research Nexus and launching your first interactive analysis environment.

Logging in to the Nexus
To access the Roman Research Nexus, visit the Roman Research Nexus.
Access to the Nexus requires a valid MyST account. Users who do not already have a MyST account must create one before logging in. Once authenticated, users are redirected to the Nexus launcher, where they can select an account, platform image, and server configuration before starting a session.
Launching Your First Nexus Session
Step 1. Select an Account
Choose the account under which your session will run. Available options include your Individual Account and any Team Accounts of which you are a member. Team accounts display the current credit balance and allocation available to the team.
Your selection determines which account is charged for resource usage, but does not affect your file access or permissions. You retain access to all files and resources you are authorized to use, including those associated with your teams.
Step 2. Select a Platform Image
Platform images provide a pre-configured software environment for your session, including Roman analysis software, simulation tools, supporting Python packages, and system dependencies.
STScI supports the latest platform image. Previous image versions will remain available for convenience, but they are not guaranteed to receive updates. If you are unsure which image to choose, select the most recent patched release. Special-purpose images may also be provided for workshops, data challenges, testing activities, or mission-specific events.
Step 3. Select a Server Type
Choose a server configuration appropriate for your workload. Larger server configurations provide additional compute resources but consume credits at a higher rate.
For new users, the Small Server is recommended for learning the platform, running tutorials, developing code, and exploring datasets. Larger server configurations can be selected as workloads become more demanding. Files stored in Nexus-managed storage persist across server restarts and shutdowns.
For a description of available server configurations, resource limits, and guidance on selecting the appropriate server type for your workload, see the Compute Resources documentation.
Step 4. Real-Time Collaboration
Team accounts provide access to Real-Time Collaboration (RTC) Servers, which allow multiple users to work simultaneously in the same live JupyterLab session. Team members can edit notebooks, execute code, and interact with the environment concurrently.
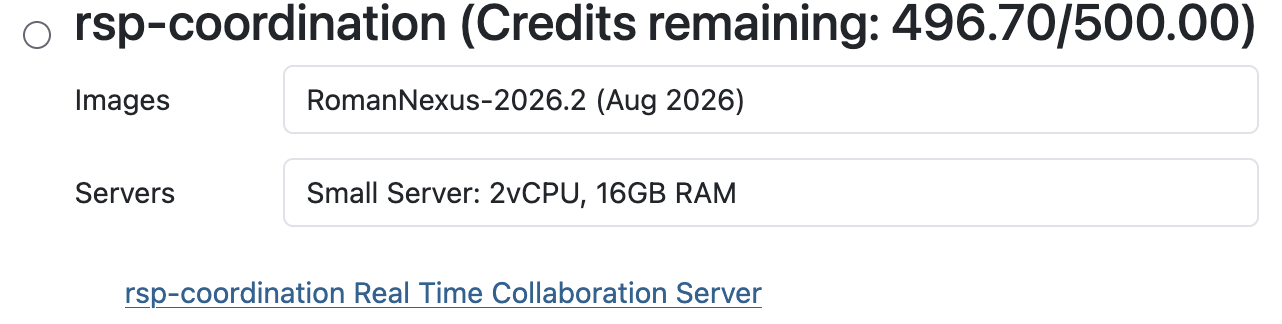
To launch an RTC server, first select the team account you want to use. Then click the Real Time Collaboration Server link displayed beneath the team account entry. For example, the figure RTC server launcher displays a team-specific RTC link below the selected team account. RTC servers launch a shared JupyterLab environment that can be accessed by authorized members of the team.
Figure RTC Server Launcher
Step 5. Start the Server
After selecting an account, platform image, and server type, click Start Server to launch your session. Startup times vary depending on the selected server configuration, with larger resource allocations generally taking longer to initialize.
Once the server is ready, JupyterLab will open. You can then explore the available Tutorials and Science Workflows within the Nexus to become familiar with Roman data products, software tools, and common analysis workflows.
For additional questions not answered in this article, please contact the Roman Help Desk.